
Almost every bed bug treatment that fails in the Miami Valley fails for the same reason, and it is not the product. It is that the home was not ready. Bed bugs do not live in the open where a technician can simply spray them; they live in seams, screw holes, cracked baseboard, the folded hem of a curtain, and the underside of a nightstand drawer. A treatment reaches what it can touch. Preparation is the process of making sure that what it can touch is everything.
This is the same checklist we give our own bed bug treatment customers after they book, written out in full so you can start before we arrive. Work through it in the three days before your appointment and you will have done the single largest thing within your control to make the treatment work the first time. If you are still deciding whether you have bed bugs at all, start with the identification guide instead and come back here once you know.
Why preparation decides whether the treatment works
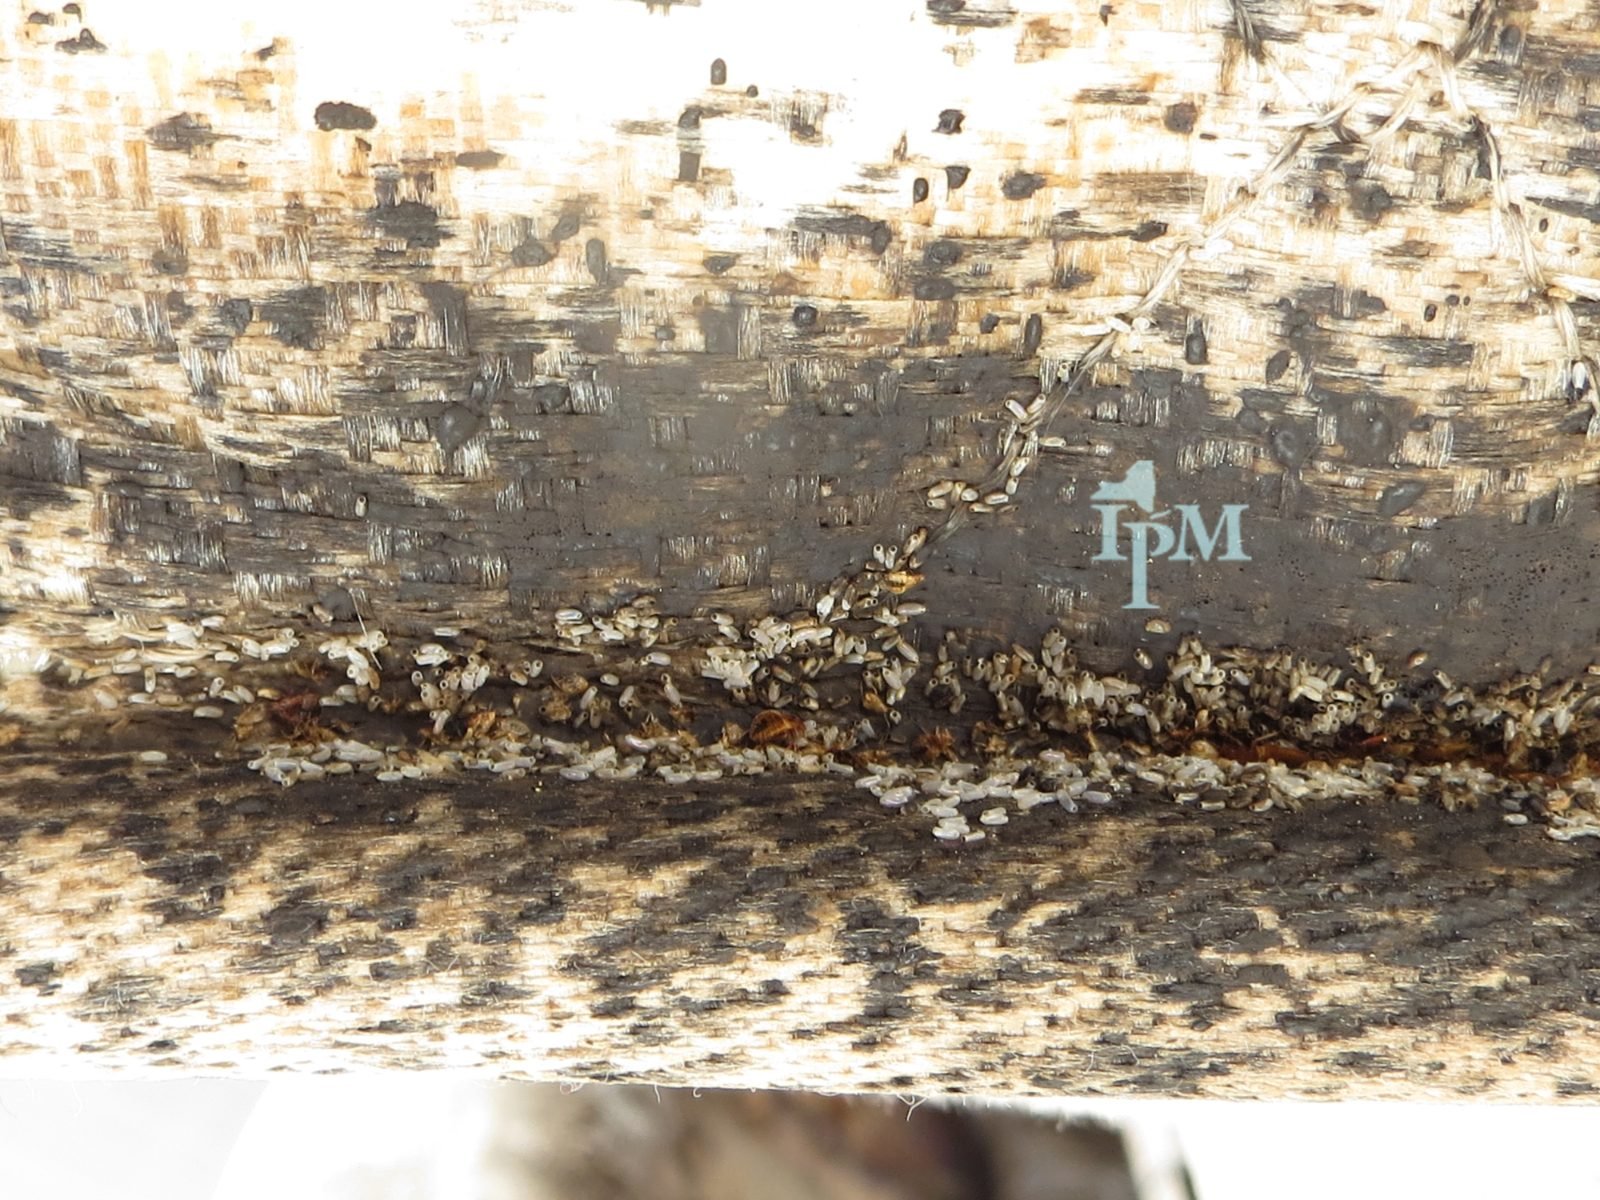
A bed bug population is not distributed evenly through a room. It is concentrated in harborage: tight, dark, protected spaces within about six feet of where a person sleeps, with a scattering of outliers pushed farther out as the population grows. The treatment strategy is to reach every one of those harborage points in a single coordinated pass, so that the survivors are too few and too scattered to rebuild. Every harborage point a technician cannot reach is a place the population restarts from.
That is why clutter matters so much more here than it does for ants or spiders. A pile of clothing on a bedroom floor is not untidy in the cosmetic sense; it is functionally a second mattress, offering hundreds of protected folds at exactly the right distance from the host. The same is true of stacked boxes, a full closet floor, plastic totes with loose lids, and anything stored under the bed. Removing that material converts a room with a hundred harborage points into a room with a dozen, and a dozen is a number a treatment can finish.
The second reason preparation matters is timing. Bed bug eggs are cemented into the same cracks the adults hide in, and they are considerably harder to kill than the adults. Eggs laid before your first treatment will hatch afterward, which is why any honest protocol includes at least one follow-up visit. Good preparation before the first visit means the follow-up is dealing with a handful of newly hatched nymphs rather than an intact second generation.
The prep sheet: what to do in the 72 hours before we arrive
Do this work in the order below. The sequence matters, because laundry that goes back into an untreated closet has to be done twice, and a room stripped before the laundry is running is a room you cannot sleep in that night.
1. Strip the beds, and keep the bedding contained
Remove sheets, blankets, comforters, pillowcases, pillows, mattress pads, and any decorative fabric from every bed in the affected rooms. Do not carry an armful of bedding through the house to the laundry room. Bring a plastic bag or bin to the bed, load it there, seal it, and carry the sealed bag. Loose bedding shedding bugs down a hallway is one of the most common ways a one-room problem becomes a three-room problem the week before treatment.
Leave the bare mattress and box spring in place. Do not wrap them, do not stand them against a wall, and above all do not put them on the curb. We need to inspect and treat both, and a mattress standing on end has already dumped whatever was in its lower seams onto the floor.
2. Empty the nightstands and the dresser
Everything in a nightstand drawer, a dresser drawer, or a built-in closet shelf within about eight feet of the bed comes out. Fabric goes into the laundry stream described below. Books, papers, electronics, and hard goods go into sealed plastic bins or bags and stay sealed until after the follow-up visit. Leave the drawers themselves in place and empty; the outside back and underside of a drawer is prime harborage and the technician needs to be able to lift each one out and turn it over.
Do not relocate any of this material to another room. A sealed bin in the corner of the treated room is correct. The same bin carried to the spare bedroom is how the spare bedroom becomes infested.
3. Clear the floor, and pull furniture off the walls
The floor of the room should be bare enough to vacuum end to end. Anything stored under the bed comes out and goes into the sealed-bin stream. Move beds, dressers, and nightstands about eighteen inches away from the walls if the room allows it, so baseboard and the back of each piece is reachable. If a piece is too heavy to move safely, leave it and tell the technician; that is a normal thing to say and not a problem.
Vacuum the floor, the baseboard line, the mattress seams, and the box spring edge the day before treatment. Use the crevice tool along seams and tufts. When you finish, remove the vacuum bag or empty the canister immediately, seal the contents in a bag, and put it in an outdoor trash container. A vacuum stored full is a vacuum that reintroduces the problem two weeks later.
4. Take down what hangs and what covers
Curtains and fabric window treatments in the affected rooms come down and join the laundry stream. Wall art, mirrors, and clocks within a few feet of the bed should be taken off the wall and set face-down on the floor so the back and hanging hardware can be checked. Loose wallpaper edges, cracked plaster, and open electrical plates near the bed are all worth pointing out when we arrive rather than trying to address yourself.
5. Make the room accessible, and plan for people and pets
Clear a working path from the front door to each room being treated. Plan for everyone, including pets, to be out of the treated areas during the visit and for the re-entry period the technician specifies before leaving. Cover or remove fish tanks and turn off their air pumps, and move pet bedding, food dishes, and water bowls out of the treatment area entirely. If anyone in the home is pregnant, an infant, elderly, or has a respiratory condition, tell us before the appointment so we plan the visit around it.
The laundry protocol, which is the part people get wrong
Heat is what kills bed bugs in fabric, and the heat that matters is the dryer, not the washer. All life stages, eggs included, die at a sustained internal temperature of roughly 120 degrees Fahrenheit. A hot wash helps, but a full cycle in a dryer on high heat for at least thirty minutes after the load is dry is the step that actually finishes them. Items that cannot be washed can very often still be dried, and a dryer-only cycle on high for thirty minutes is a legitimate treatment for a dry-clean-only jacket or a pair of curtains.
Sort into three piles as you strip the room. Washable fabric goes to hot wash plus high-heat dry. Non-washable fabric goes to high-heat dry alone. Anything that cannot take any heat at all, such as certain delicates, leather, or older photographs, goes into a sealed bag, gets set aside, and gets raised with the technician rather than guessed at. Do not let a pile of any of the three sit on the floor of a treated room after it has been through the dryer.
The step almost everyone misses is what happens after the dryer. Clean, heat-treated laundry must go straight from the dryer into a fresh sealed bag or bin, and it must stay sealed until after the follow-up visit is complete. Folding a warm, clean load and putting it back into the dresser in the room we are about to treat undoes the entire morning. Use new bags for treated items and throw away the bags that held the untreated material, outside, immediately.
One practical warning about laundromats. If you do not have a machine at home, a laundromat is workable, but transport everything in sealed bags, do not set the bags on folding tables or seating, load directly from the sealed bag into the machine, and bag the finished load in new bags before you leave. Bed bugs travel exceptionally well in laundry baskets, and a shared laundry room is one of the more reliable ways to move an infestation between households.
Five things not to do, ranked by how much damage they cause
Most of the bed bug jobs that turn into long, expensive jobs did so because of something the household did with good intentions in the two weeks before calling. These are the five worth naming.
Do not set off a fogger or bug bomb
This is the single most damaging thing you can do to your own case. Total release foggers deposit a light residue on exposed horizontal surfaces and reach essentially none of the cracks bed bugs actually occupy. What they do accomplish is dispersal: the population scatters out of the treated room into wall voids, adjoining rooms, and neighboring units, converting a contained problem into a distributed one. A job that would have taken two visits routinely takes four or five afterward.
Do not move to the couch or another bedroom
It is the most natural response in the world and it is exactly wrong. Bed bugs orient toward carbon dioxide and body heat, which means they follow the person, not the furniture. Sleeping on the living room couch for a week does not escape the infestation; it establishes a second one in the couch, and couches are markedly harder to treat than beds. Keep sleeping in your own bed until the treatment is done. That advice sounds unbearable and it is genuinely the right call.
Do not throw out the mattress or the furniture
Discarding a mattress rarely solves anything, because the population is never only in the mattress, and it usually creates two new problems: the cost of replacing it, and the trail of bugs left on the stairs and in the hallway on the way to the curb. A new mattress delivered into an untreated room is infested within weeks. Encasements are the better answer, and they cost a fraction of a mattress. If a piece genuinely must go, tell us first so it can be treated, wrapped, and marked before it leaves the house.
Do not apply store-bought sprays to the bed
Over-the-counter residual sprays applied to a mattress and box spring cause two problems. They are frequently used in ways the label does not permit, which matters legally as well as practically, and the repellent action of several common products pushes bed bugs off the bed and deeper into the room. That makes the professional treatment that follows harder, because the population is now spread across furniture and baseboard instead of concentrated where it can be finished.
Do not deep-clean the room right before we arrive, beyond what is listed above
Vacuuming is helpful. Washing walls, shampooing carpet, or repainting immediately before treatment is not, because it removes the evidence a technician reads to find harborage and it can interfere with how a product bonds to a surface. Follow the prep sheet and stop there. Save the deep clean for after the follow-up.
Conventional treatment versus heat: how the prep differs
There are two broad approaches to a structural bed bug job, and the preparation is not the same for both. Ask which one your appointment is before you start, because a few of the steps actively conflict.
A conventional treatment uses targeted application into and around harborage, combined with mechanical work such as vacuuming, steam, and encasements, across an initial visit and at least one follow-up. Preparation is the checklist above: strip, launder, declutter, pull furniture off the walls, and keep treated items sealed. Sealed plastic bins are your friend throughout, and items can stay in the room as long as they are sealed.
A whole-room heat treatment raises the entire space to a lethal temperature and holds it there, which reaches harborage no application can. The prep is different in an important way: sealed plastic bins are now a liability rather than a help, because they insulate their contents against the heat you are paying for. For a heat job you generally want belongings loosely arranged and opened up so air can move through, and you must remove anything heat will ruin, which includes candles, aerosols, pressurized containers, some cosmetics, vinyl records, musical instruments, certain electronics, medications, houseplants, wine, and anything with a wax or low-melting component.
The overlap between the two lists is large but the exceptions matter, so we confirm the approach when the appointment is booked and send prep instructions matched to it. If you are reading this before you have talked to anyone, do the shared work first: laundry, decluttering, and clearing floor space help either way.
What your treatment plan actually looks like, visit by visit
People search for a bed bug protocol expecting a single event. It is not one; it is a short sequence with a defined end, and knowing the shape of it in advance removes most of the anxiety.
The inspection
Before anything is applied, a technician confirms the identification and maps the extent. That means checking mattress and box spring seams, the bed frame and its joints and screw holes, headboard mounts, nightstands, the perimeter of the room at the baseboard, upholstered furniture, and outward from there until the edge of the population is found. The result determines which rooms are treated, and it is common for the answer to be more rooms than the household expected and occasionally fewer.
The first treatment
The initial visit is the heavy one and typically runs a few hours depending on the number of rooms. It combines direct work on harborage with application of materials labeled for the surfaces involved, plus mechanical steps such as steam and vacuuming where they help. Every application is made under the product label and recorded, including the product, the EPA registration number, and the licensed applicator, and that record stays on file.
Encasements and monitors
Mattress and box spring encasements go on after the first treatment and stay on. They trap anything remaining inside, where it cannot feed, and they turn a complicated quilted surface into a smooth one that can be wiped and inspected in seconds for the following year. Interceptor cups under the bed legs do the monitoring job: they catch bugs moving toward or away from the bed and give a straightforward read on whether anything is still active.
The follow-up visit, usually ten to fourteen days later
This is not optional and it is not an upsell. Eggs present at the first visit hatch on roughly a one to two week schedule, and the follow-up is timed to catch that hatch before any of it reaches maturity and starts laying. The technician re-inspects, reads the interceptors, and treats what the first visit could not reach. Some jobs need a third visit; heavy or long-established populations sometimes need a fourth, and we will say so rather than let you discover it.
Clearance
A job is finished when inspection and interceptors show no activity across a full monitoring interval after the last treatment, and no one in the home is reporting new bites that hold up to inspection. Bites alone are a poor clearance test, because reactions can lag by days and other things bite too, which is why the physical evidence governs.
The day of treatment, and the two weeks after
On the day, leave the prep in place and be ready to hand over access rather than explanations. Plan for the home to be empty of people and pets during the visit and through the re-entry interval the technician gives you before leaving, which depends on the materials used and the ventilation of the space. Do not shorten that interval because the house looks fine.
When you come back, put the beds back together with clean, heat-treated bedding and let the sheets hang clear of the floor rather than pooling on it. Move the bed frame back to roughly where it was but keep it from touching the wall if the room allows. The bed should be an island: nothing touching it except the floor through its own legs, with interceptors under those legs. That single arrangement does more to protect a treated room than anything else you can do.
Do not vacuum, mop, or wash treated baseboard and perimeter surfaces for the interval the technician specifies, because doing so removes the residual that is doing the work between visits. Vacuuming the open floor is generally fine; scrubbing the treated edge is not. Keep the sealed bins sealed until after the follow-up.
Expect to see some activity in the first week or two, and expect it to be alarming out of proportion to what it means. Bugs disturbed out of harborage move around in the open, which makes a declining population briefly more visible than a stable one was. What matters is the trend across the follow-up visit, not the count on day three. Keep a simple note of what you find and where, and bring it to the follow-up; it is genuinely useful data for the technician.
Report anything you find rather than treating it yourself. If new bites appear after the follow-up, or an interceptor catches something two weeks out, call us at (937) 569-3330 and we will come and look. That is a normal part of the sequence, not a complaint.
The short version, if you only have an hour
If the appointment is tomorrow and you are reading this tonight, do these six things in this order and you will have covered most of the value: strip all bedding into sealed bags at the bed; run everything washable through a hot wash and a thirty-minute high-heat dry, then seal it in fresh bags; empty nightstands and dressers into sealed bins that stay in the room; clear the floor completely, including under the bed; vacuum the floor, baseboard, and mattress seams, then empty the vacuum into an outdoor bin; and pull the beds and dressers eighteen inches off the walls.
Everything else on this page is refinement. Those six are the ones that change the outcome, and a household that does only those is in far better shape than one that reads the whole checklist and starts nothing.
Frequently asked questions
How long does bed bug treatment preparation take?
For a single bedroom, budget most of a day, and the laundry is what governs the clock rather than the cleaning. A two or three bedroom job spread across a weekend is realistic. Start with the laundry so the machines are running while you do the decluttering and vacuuming.
Do I really have to wash everything in the house?
No. The prep applies to the affected rooms and to fabric within roughly eight feet of where people sleep, not to the whole house. Washing every textile you own is exhausting, unnecessary, and moves material through the home in ways that can spread the problem. Ask the technician to define the boundary at the inspection.
Is there a printable bed bug prep sheet?
This page is the prep sheet. It is written to be printed or read on a phone while you work, and the six-step short version near the end covers the essentials if you are short on time. If you would rather we email it to you when you book, ask and we will send it with your appointment confirmation.
What temperature kills bed bugs in the dryer?
A sustained internal temperature of about 120 degrees Fahrenheit kills all life stages including eggs. In practice that means a household dryer on its high heat setting for at least thirty minutes measured after the load is already dry. The washer helps but does not do the killing; the dryer does.
Can I just use a bug bomb first to knock the numbers down?
No, and this is the one instruction on the page we would ask you to take literally. Total release foggers reach almost none of the cracks bed bugs occupy and reliably scatter the population into wall voids and adjoining rooms. It converts a contained job into a distributed one and typically doubles the number of visits required.
Should I throw away my mattress?
Almost never. The population is not confined to the mattress, a replacement delivered into an untreated room becomes infested quickly, and carrying an infested mattress through the house seeds the route it travels. A quality encasement costs a small fraction of a mattress and does more. If something genuinely has to be discarded, tell us so it can be treated and wrapped before it moves.
How many treatments will I need?
Most residential jobs resolve in two visits, the initial treatment and a follow-up ten to fourteen days later timed to the egg hatch. Heavier or longer-established populations take three, occasionally four. The inspection is what tells us which case you are, and we would rather tell you at the start than surprise you later.
Can I sleep in my bed after treatment?
Yes, and you should, once the technician clears you to re-enter. Remaking the bed with clean heat-treated bedding and sleeping in it as normal is part of the strategy, because you are the reason the remaining bugs move toward the interceptors under the legs. Moving to a couch or another room spreads the infestation to that room instead.
What should I do between the first visit and the follow-up?
Keep sealed bins sealed, keep bedding clear of the floor, leave the treated perimeter unwashed for the interval you are given, and write down anything you find and where. Do not apply anything yourself, and do not rearrange the room. Bring your notes to the follow-up.
Do you guarantee the treatment will work?
Our Protection Plan customers are covered for return visits between scheduled services at no additional charge if something comes back. For one-time bed bug work outside of a plan, the treatment protocol including the scheduled follow-up is quoted up front so you know exactly what is included before we start, and we will always tell you if the inspection suggests more visits than the standard two.